Are you looking to secure your cryptocurrency investments? With the increasing popularity of digital currencies, it’s crucial to have a secure and reliable wallet to store your assets. Ledger Nano S is one of the most trusted hardware wallets in the market, offering top-notch security and convenience.
In this comprehensive guide, we will walk you through the process of getting started with Ledger Nano S, from setting up the device to making your first transaction. Whether you’re a beginner or an experienced crypto enthusiast, this guide will provide you with all the information you need to safely manage your digital assets.
Setting up your Ledger Nano S is quick and easy. Simply connect the device to your computer using the provided USB cable, and follow the step-by-step instructions on the device’s screen. You will be prompted to set a PIN code, which will serve as the first line of defense against unauthorized access to your wallet.
Once your Ledger Nano S is set up, you can start managing your cryptocurrencies. The device supports a wide range of digital currencies, including Bitcoin, Ethereum, and Litecoin, among others. You can easily install and uninstall apps to manage different currencies, making it a versatile wallet for all your crypto investments.
When it comes to making transactions, Ledger Nano S offers optimal security. The device stores your private keys offline, ensuring that they are never exposed to potential hackers. By confirming transactions on the device’s screen, you can verify and approve each transaction securely, giving you peace of mind with every transaction you make.
Whether you’re a seasoned crypto investor or just getting started with digital currencies, Ledger Nano S is an essential tool for securely managing your assets. With its unrivaled security features and user-friendly interface, you can confidently take control of your cryptocurrencies and protect your investments.
- Setting up your Ledger Nano S
- Unboxing and connecting the device
- Installing the Ledger Live software
- Setting up a PIN code
- Managing your Cryptocurrencies
- Adding and removing cryptocurrency accounts
- Transferring cryptocurrencies to your Ledger Nano S
- Checking your account balance and transaction history
- Securing your Ledger Nano S
- Enabling two-factor authentication
- Creating a recovery phrase
- Updating the firmware and apps
- Using Ledger Nano S with Third-party Applications
- Frequently Asked Questions:
- What is the Ledger Nano S?
- Is the Ledger Nano S safe?
- How do I set up my Ledger Nano S?
- Can I use the Ledger Nano S with multiple cryptocurrencies?
- What happens if I lose my Ledger Nano S?
- Can I use the Ledger Nano S on a mobile device?
- Video:
- Ledger Hardware Wallet Risks!? Here’s Everything We Know!
- Ledger Nano S Tutorial : Setup and Guide (Hardware wallet)
- Ledger Nano X Tutorial: Beginners Guide on How to Set up a Ledger Nano Wallet
Setting up your Ledger Nano S
Getting started with your Ledger Nano S is quick and easy. Follow the steps below to set it up:
- Connect your Ledger Nano S with your computer: Use the USB cable provided to connect your Ledger Nano S to your computer.
- Power on your Ledger Nano S: Press the button located at the top of the device to turn it on.
- Select a PIN code: Use the buttons on the device to navigate and select a PIN code. This PIN code will be used to access your Nano S whenever you make transactions or access your wallets.
- Write down your recovery phrase: Your Ledger Nano S will display a recovery phrase. Write down this phrase and keep it in a safe place. The recovery phrase is important as it allows you to recover your funds in case your device is lost, stolen, or damaged.
- Confirm your recovery phrase: Your Ledger Nano S will ask you to confirm your recovery phrase by selecting specific words from the list. Make sure to verify the words carefully to ensure they match the ones you wrote down.
- Install Ledger Live: Visit the Ledger website (www.ledger.com) and download and install Ledger Live, the official application for managing your Ledger device.
- Access your wallets: Once you have installed Ledger Live, you can connect your Ledger Nano S to your computer and access your wallets. Ledger Live provides a user-friendly interface for managing your cryptocurrencies.
Now that you have set up your Ledger Nano S, you can start using it to securely store and manage your cryptocurrencies. Remember to always keep your recovery phrase safe and never share it with anyone.
Unboxing and connecting the device
Once you have purchased the Ledger Nano S, it’s time to get started with the device. Follow the steps below to unbox and connect the device:
- Unbox the device and remove all the contents from the package.
- Take out the Ledger Nano S device and locate the USB cable that comes with it.
- Connect one end of the USB cable to the USB port on your computer or laptop.
- Connect the other end of the USB cable to the USB port on the Ledger Nano S device.
- Wait for the device to power on. You will see a loading screen followed by the main menu.
- Use the left and right buttons on the device to navigate through the menu.
- Select “Set up as new device” and press both buttons to confirm your selection. This will initialize the device.
Once the device is initialized, you can proceed with setting up a PIN and creating a new wallet. This will ensure the security of your transactions and protect your funds. Follow the prompts on the device’s screen to complete the setup process.
It is important to note that your Ledger Nano S is not ready for transactions until it is connected to a computer or mobile device with the Ledger Live application installed. Make sure to complete the setup and connection process before attempting any transactions with your Ledger Nano S.
Installing the Ledger Live software

Step 1: Begin by plugging in your Ledger Nano S device to your computer using the provided USB cable.
Step 2: Access the Ledger website by opening your web browser and navigating to www.ledger.com.
Step 3: On the Ledger website, locate and click on the “Downloads” section on the top menu.
Step 4: Find the Ledger Live software for your specific operating system (Windows, Mac, or Linux), and click on the respective download button.
Step 5: Once the download is complete, open the installer file and follow the on-screen instructions to install the Ledger Live software on your computer.
Step 6: After the installation is complete, launch the Ledger Live software by double-clicking on the desktop icon or finding it in your applications folder.
Step 7: When prompted, select “Initialize new device” on the Ledger Live software.
Step 8: Follow the on-screen instructions to set up your Ledger Nano S device with the Ledger Live software.
Step 9: Once the setup is complete, you can start managing your cryptocurrency assets, checking your balances, and initiating transactions using the Ledger Live software.
Note: Make sure to keep your Ledger Nano S device and recovery phrase in a safe place to ensure the security of your cryptocurrency.
Setting up a PIN code

When you first set up your Ledger Nano S, one of the important steps is to set up a PIN code for your device. The PIN code acts as a security measure to protect your wallets and transactions from unauthorized access.
Here’s how you can set up a PIN code on your Ledger Nano S:
- Connect your Ledger Nano S to your computer using the provided USB cable.
- Press both buttons on your Ledger Nano S to restart it.
- Use the left and right buttons to navigate through the options on the device’s screen.
- Select “Configure new device” and press both buttons to confirm.
- Select a PIN code length (4 to 8 digits) and press both buttons to confirm.
- Enter your desired PIN code using the left and right buttons and press both buttons to confirm each digit.
- Confirm your PIN code by re-entering it using the left and right buttons.
- Once your PIN code is set up, your Ledger Nano S is ready to be used with your wallets.
Remember to choose a PIN code that is easy for you to remember but difficult for others to guess. Avoid using simple combinations such as “1234” or “0000”. Keeping your PIN code secure is crucial for protecting your cryptocurrencies and ensuring the safety of your transactions.
It is recommended to write down your PIN code and store it in a secure place, separate from your Ledger Nano S device. This will serve as a backup in case you forget your PIN code or lose access to your device.
Setting up a strong PIN code is an essential step in ensuring the security of your Ledger Nano S and your digital assets. Take the time to choose a unique and memorable PIN code that will keep your cryptocurrencies safe.
Managing your Cryptocurrencies
Once you have set up your Ledger Nano S device and installed the compatible wallet applications, you are ready to manage your cryptocurrencies. With the Ledger Nano S, you can securely store and perform transactions with various digital assets.
To manage your cryptocurrencies, follow these steps:
- Connect your Ledger Nano S: Connect your device to the computer using the provided USB cable.
- Unlock your Ledger Nano S: Enter your PIN code on the device to unlock it.
- Open the wallet application: Open the specific wallet application on your computer for the cryptocurrency you want to manage.
- Sync your wallet: In the wallet application, click on the sync or refresh button to sync your wallet with the blockchain network.
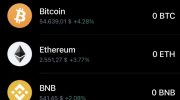
- View your balances: Once your wallet is synced, you will be able to view the balances of your cryptocurrencies.
- Perform transactions: To send or receive cryptocurrencies, click on the transaction button in the wallet application. Follow the prompts to enter the details of the transaction, such as the recipient’s address and the amount to send.
- Confirm the transaction: After entering the transaction details, confirm the transaction on your Ledger Nano S. Verify the transaction details on the device’s screen and confirm or decline the transaction.
- Check transaction status: Once the transaction is submitted, you can check the transaction status in the wallet application or on the blockchain explorer.
By following these steps, you can easily manage your cryptocurrencies using Ledger Nano S and its compatible wallet applications. Remember to always double-check the transaction details before confirming any transactions to ensure the accuracy and security of your digital assets.
Adding and removing cryptocurrency accounts
One of the features of the Ledger Nano S is the ability to manage multiple cryptocurrency wallets on a single device. This allows you to securely store and transact with multiple cryptocurrencies without the need for multiple physical wallets.
To add a new cryptocurrency account to your Ledger Nano S, follow these steps:
- Connect your Ledger Nano S to your computer using the provided USB cable.
- Enter your PIN code on the Ledger Nano S device.
- Open the Ledger Live application on your computer.
- Click on the “Manager” tab in the left sidebar.
- Find the cryptocurrency you want to add in the list and click on “Install” next to it.
- Follow the on-screen instructions to complete the installation process.
Once the cryptocurrency account is added, you can access it through the Ledger Live application. Simply click on the “Accounts” tab in the left sidebar and select the desired account to view its balance and transaction history.
If you want to remove a cryptocurrency account from your Ledger Nano S, follow these steps:
- Connect your Ledger Nano S to your computer using the provided USB cable.
- Enter your PIN code on the Ledger Nano S device.
- Open the Ledger Live application on your computer.
- Click on the “Manager” tab in the left sidebar.
- Find the cryptocurrency account you want to remove in the list and click on the trash bin icon next to it.
- Follow the on-screen instructions to confirm the removal.
It’s important to note that removing a cryptocurrency account from your Ledger Nano S does not affect the actual balance of the account. It simply removes the account from the Ledger Live application, and you can still access and manage the account using other wallet software compatible with that cryptocurrency.
Transferring cryptocurrencies to your Ledger Nano S
Once you have set up your Ledger Nano S and installed the required applications, you can start transferring your cryptocurrencies to your device. This guide will show you how to do it.
Step 1: Connect your Ledger Nano S
- Connect your Ledger Nano S device to your computer using the provided USB cable.
- Enter your PIN code on the device to unlock it.
Step 2: Open the Ledger Live application
- If you haven’t already done so, download and install the Ledger Live application on your computer.
- Open the Ledger Live application.
Step 3: Select the cryptocurrency you want to transfer
- In the Ledger Live application, select the relevant cryptocurrency account that you want to transfer from.
Step 4: Initiate the transaction
- Click on the “Send” button in the Ledger Live application.
- Enter the recipient’s wallet address in the provided field. Make sure to double-check the address to ensure accuracy.
- Specify the amount of cryptocurrency you want to transfer.
- Review the transaction details and verify that everything is correct.
- Click on the “Continue” button to proceed.
Step 5: Confirm the transaction on your Ledger Nano S
- On your Ledger Nano S device, review the transaction details displayed on the screen.
- Press the right button to confirm the transaction.
Step 6: Wait for the transaction confirmation
- Wait for the transaction to be processed and confirmed by the blockchain network.
- Once confirmed, the transferred cryptocurrency will be reflected in the recipient’s wallet.
Note: The time it takes for a transaction to be confirmed can vary depending on network congestion and the specific cryptocurrency being transferred.
Step 7: Verify the transaction on the blockchain
- To confirm that the transaction was successful, you can view it on the blockchain explorer of the relevant cryptocurrency.
- Enter the transaction ID (also known as the transaction hash) into the blockchain explorer’s search bar.
- You should be able to see the transaction details, including the sender, recipient, and amount transferred.
That’s it! You have successfully transferred your cryptocurrencies to your Ledger Nano S device. Remember to always double-check the recipient’s address and transaction details before confirming the transfer to ensure the safety of your funds.
Checking your account balance and transaction history

Once you have set up your Ledger Nano S and installed the necessary wallets, you can easily check your account balance and transaction history.
To check your account balance, follow these steps:
- Connect your Ledger Nano S to your computer using the USB cable.
- Enter your PIN code on the device when prompted.
- Open the wallet application for the specific cryptocurrency you want to check.
- Select the option to “View Account Balance.”
- Your account balance will be displayed on the screen of your Ledger Nano S.
To view your transaction history, you can follow these steps:
- Connect your Ledger Nano S to your computer using the USB cable.
- Enter your PIN code on the device when prompted.
- Open the wallet application for the specific cryptocurrency you want to check.
- Select the option to “View Transaction History.”
- A list of your recent transactions will be displayed, including details such as the transaction amount, sender/receiver addresses, and the date/time.
It is important to regularly check your account balance and transaction history to ensure the accuracy of your transactions and to monitor any unauthorized activity. The Ledger Nano S provides a secure and easy way to access this information, giving you peace of mind when managing your cryptocurrencies.
Securing your Ledger Nano S

When it comes to securing your cryptocurrency transaction, your Ledger Nano S is a powerful tool that provides essential protection. By following these simple steps, you can ensure that your digital assets remain safe and secure.
- Create a strong PIN: Upon setting up your Ledger Nano S, you will be prompted to create a PIN. Be sure to choose a strong PIN that is unique and difficult to guess. Avoid using easily deducible numbers like birth dates or sequential numbers.
- Enable 2-factor authentication: To add an extra layer of security, enable 2-factor authentication on your Ledger Nano S. This will require you to confirm transactions using both the device and your mobile phone.
- Check your address: Always double-check the address displayed on your device’s screen before making a transaction. This ensures that you are sending your cryptocurrency to the intended recipient and not a malicious address.
- Keep your recovery phrase safe: During the initial setup process, you will be given a recovery phrase. Write it down and keep it in a safe place. This phrase will enable you to restore your account in case you lose your device or forget your PIN.
- Use the official Ledger Live application: The official Ledger Live application is the recommended software to manage and interact with your Ledger Nano S. Avoid using third-party applications or software to reduce the risk of potential security vulnerabilities.
By following these best practices, you can confidently use your Ledger Nano S to securely manage your cryptocurrency transactions. Remember to always stay vigilant and be cautious with your personal information and digital assets.
Enabling two-factor authentication
To ensure the security of your Ledger Nano S and protect your digital assets, it is highly recommended to enable two-factor authentication (2FA). This adds an extra layer of security to your device and helps prevent unauthorized access to your cryptocurrency.
With two-factor authentication enabled, you will need to provide an additional verification code, in addition to your PIN, when performing any transaction on your Ledger Nano S. This verification code is usually generated through a mobile app or a security key.
Enabling two-factor authentication on your Ledger Nano S is easy. Just follow these steps:
- Connect your Ledger Nano S to your computer or mobile device using the provided USB cable.
- Open the Ledger Live application on your computer or mobile device.
- Select your Ledger Nano S device from the list of available devices.
- Go to the “Security” or “Settings” section in the Ledger Live application.
- Click on the option to enable two-factor authentication.
- Follow the on-screen instructions to complete the setup process.
Once you have enabled two-factor authentication, you will need to enter the verification code generated by your mobile app or security key every time you perform a transaction on your Ledger Nano S. This additional layer of security helps ensure that even if your PIN is compromised, your digital assets remain safe.
Remember to choose a reliable and secure two-factor authentication method, such as a reputable mobile app or a hardware security key, to further enhance the security of your Ledger Nano S.
Creating a recovery phrase
A recovery phrase, also known as a seed phrase or a mnemonic phrase, is a crucial part of setting up your Ledger Nano S. It functions as a backup for your wallets and transactions on the device.
When you set up your Ledger Nano S for the first time, you will be prompted to create a recovery phrase. This phrase consists of 24 words selected from a predefined list of words.
It is important to write down and store your recovery phrase in a safe and secure location. The recovery phrase is the only way to access your wallets and funds in case of loss, damage, or theft of your Ledger Nano S.
When writing down your recovery phrase, make sure to:
- Write each word in the correct order
- Use pen and paper instead of typing or printing it
- Keep it offline and away from prying eyes
- Make multiple copies and store them in separate locations
Remember that your recovery phrase is extremely sensitive as it grants anyone who possesses it access to your wallets and funds. Treat it like the keys to your digital assets.
In case you lose or forget your recovery phrase, there is no way to recover it. This is why it is crucial to create it and store it securely when setting up your Ledger Nano S.
Updating the firmware and apps
Regularly updating the firmware and apps on your Ledger Nano S is essential for maintaining the security and functionality of your device. By updating the firmware, you ensure that any vulnerabilities or bugs in the software are patched, and new features and improvements are added.
To update the firmware on your Ledger Nano S, follow these steps:
- Connect your Ledger Nano S to your computer using the provided USB cable.
- Open the Ledger Live application on your computer.
- Enter your PIN code on the device to unlock it.
- In the Ledger Live application, click on the “Manager” tab.
- Your Ledger Nano S will be listed under “Devices” in the left sidebar. Click on it.
- Click on the “Firmware” section.
- If a firmware update is available, click on the “Install” button.
- Follow the on-screen instructions to complete the firmware update. Make sure to keep your Ledger Nano S connected to the computer throughout the update process.
After the firmware update is complete, you can update the apps on your Ledger Nano S to ensure compatibility with the latest firmware. Follow these steps to update the apps:
- In the Ledger Live application, click on the “Manager” tab.
- Your Ledger Nano S will be listed under “Devices” in the left sidebar. Click on it.
- Click on the “Apps” section.
- If app updates are available, click on the “Update” button next to each app that needs to be updated.
- Follow the on-screen instructions to complete the app updates.
It is important to note that during the firmware or app update process, you should not disconnect or turn off your Ledger Nano S. Interrupting the update can result in a bricked device or loss of funds. Make sure to follow the instructions carefully and wait for the update to complete before using your Ledger Nano S for any transaction.
Using Ledger Nano S with Third-party Applications

If you want to expand the functionality of your Ledger Nano S and use it with third-party applications, you’re in luck. The Ledger Nano S is compatible with a wide range of external applications, allowing you to securely manage your cryptocurrency transactions.
Before you start using your Ledger Nano S with third-party applications, make sure you have the latest firmware version installed. You can easily update the firmware by connecting your device to your computer and following the instructions provided on the Ledger Live application.
Once your Ledger Nano S is up to date, you can connect it to your preferred third-party application. These applications could include popular cryptocurrency wallets, decentralized exchanges, or other blockchain-related services.
To use Ledger Nano S with a third-party application, follow these steps:
- Install the application or wallet on your computer or mobile device.
- Open the application and navigate to the settings or account section.
- Select “Ledger Nano S” as your preferred hardware wallet option.
- Connect your Ledger Nano S to your computer or mobile device using the provided USB cable.
- Unlock your Ledger Nano S and follow the instructions on the application’s interface to confirm the connection.
Once the connection is established, you can start using your Ledger Nano S to securely sign and authorize transactions within the third-party application. The Ledger Nano S will store your private keys offline, preventing them from being exposed to potential threats.
It is important to note that when using third-party applications with your Ledger Nano S, you should make sure that the application is trustworthy and comes from a reliable source. Be cautious of phishing attempts or fake applications that may try to steal your funds.
In conclusion, the Ledger Nano S can be easily integrated with third-party applications, allowing you to securely manage your cryptocurrency transactions. By following the steps outlined above and being cautious of potential threats, you can confidently use your Ledger Nano S with a wide range of external applications.
Frequently Asked Questions:
What is the Ledger Nano S?
The Ledger Nano S is a hardware wallet that provides secure storage for cryptocurrencies. It is a small USB device that can be connected to a computer or smartphone.
Is the Ledger Nano S safe?
Yes, the Ledger Nano S is considered one of the most secure ways to store cryptocurrencies. It uses advanced security features, such as a secure chip and PIN code, to protect your private keys from hacking or theft.
How do I set up my Ledger Nano S?
To set up your Ledger Nano S, you first need to download the Ledger Live software on your computer or smartphone. Then, connect your Nano S to the device and follow the step-by-step instructions provided by the software.
Can I use the Ledger Nano S with multiple cryptocurrencies?
Yes, the Ledger Nano S supports over 30 different cryptocurrencies, including Bitcoin, Ethereum, and Ripple. You can manage and store multiple cryptocurrencies on the same device.
What happens if I lose my Ledger Nano S?
If you lose your Ledger Nano S, you don’t have to worry about losing your cryptocurrencies. Your private keys are backed up and can be restored on a new device using your recovery phrase. However, it is important to keep your recovery phrase in a safe place.
Can I use the Ledger Nano S on a mobile device?
Yes, the Ledger Nano S can be used with both computers and mobile devices. You can connect it to your smartphone using an OTG cable to manage your cryptocurrencies on the go.
Video:
Ledger Hardware Wallet Risks!? Here’s Everything We Know!
Ledger Nano S Tutorial : Setup and Guide (Hardware wallet)
Ledger Nano X Tutorial: Beginners Guide on How to Set up a Ledger Nano Wallet